This is an old revision of the document!
- Linux
- Windows
- Android
Webius Officium ─ NiMBUS deBlanc
Name: NiMBUS deBlanc (official) | 구운몽 (korean)
Specification
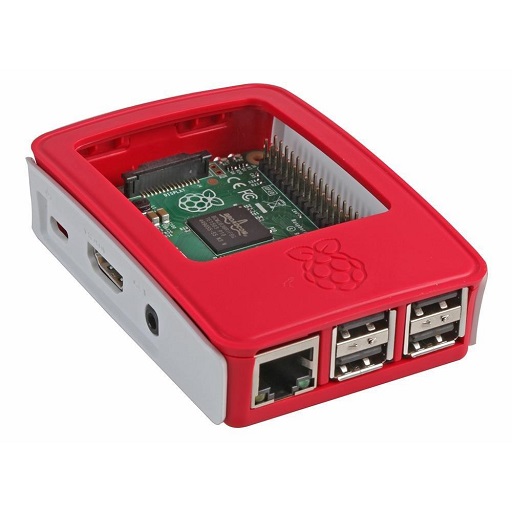
Model: Raspberry Pi 3 Model B Raspbierry Pi Model B
Storages — Storage in details
240G—/var/wwwpartition500G—~/storagepartition
Live status of storages
Mounted on    Type  Size  Used Avail Use%
~/storage     ext4  458G  280G  155G  65%
/var/www      ext4  220G   18G  191G   9%
- Wired (
eth0) - Wireless Connection (
wlan0) - Wired (
eth1)
Web service and web resources including WebDAV
Hosting Services
Júne's PiON Gateway — WebDAV and Documents Archives
Júne's Cloud Platform — Gateway for all cloud services
Júne's Wiki — What I Know Is … Here
Showing lively on OWL for NiMBUS deBlanc
+Work logs
- ““Fresh installation — Updated on 2020/07/25 04:13 * Change
backup rsyncto another partition — Updated on 2020/06/27 04:01 * Changeweb rootofeigen.ml,dav.meson.in&pdf.meson.in— Updated on 2020/06/27 04:00 * Plugin Wireless LAN & Wired Giga LAN — Updated on 2020/02/22 03:32 * Fresh installation — Updated on 2020/02/11 02:16 *Renew SSL certificates(Let's Encrypt) done — Updated on 2019/08/01 18:48 *configureaccess.log and error.log separately — Updated on 2018/09/20 11:12 *createserver block for [dav.meson.in] — Updated on 2018/08/14 15:35 *OptimizeNginx configuration forDokuwikireference content *createserver block for [lib.meson.one] library project — Updated on 2018/04/11 18:22 * Activate gzip module in Nginx — Updated on 2018/02/27 06:10 * Configured HTTP/2 for all sites — Updated on 2018/02/15 19:45 * Finished to publish front page ofpi.meson.oneandcloud.meson.in*Add USB Wireless (802.11n)and assigned — Updated on 2018/01/31 19:47=== +Que to do === * reverse proxy configuration * rsync with cloud service such as Box or Dropbox * Check security for WebDAV access and configuration
—- ==== Disable Build-in Radios ==== Edit
landing page) in/boot/config.txt<code ini> dtoverlay=disable-wifi dtoverlay=disable-bt </code> —- ==== Enable your Server Blocks ==== <code bash> sudo ln -s /etc/nginx/sites-available/example.com /etc/nginx/sites-enabled/ </code> —- ==== Let's Encrypt ==== Login with Superuserrootand clone required packages. Target directory is/root/letsencrypt. Target directory could be wherever you want, which you should be careful about security and permission. Therefore,/rootdirectory is a recommended whereas. <code bash> sudo su git clone https://github.com/letsencrypt/letsencrypt /root/letsencrypt </code> Go to target directory to run the script <code bash> cd /root/letsencrypt ./certbot-auto certonly –webroot –rsa-key-size 4096 -w /var/www/YOUR_ROOT_DIR/ -d YOUR.DOMAIN.COM </code>YOUR_ROOT_DIRis root directory for the service ofYOUR.DOMAIN.COM.–rsa-key-sizecould be altered with another bit such as 2048 or less but 4096 is better choice for better security. After reviewing the successful messages, then default location of certificates is/etc/letsencrypt/live/YOUR.DOMAIN.COM/. Usual error has something to do with not loading any pages inhttpprotocol. So you make sure even simple page (YOUR_ROOT_DIRproperly. MAKE SURE the renewal of certificates every 90 days === Renew Let's Encrypt certificates === For renewal certificates, runcertbot-autoand follow the proceeds. <code bash> ./certbot-auto –domains YOUR.DOMAIN.COM </code> === Renew all Let's Encrypt certificates === Renew ALL certificates from Let's Encrypt, run <code bash> ./certbot-auto renew </code> === Delete certificate(s) === Delete certificates from Let's Encrypt, run <code bash> ./certbot-auto delete </code> —- ==== Let's Encrypt via repository ==== <code bash> sudo apt update sudo apt install certbot python-certbot-nginx </code> command is same ascertbot-autobyrootprivilege. === Create certificate(s) === <code bash> certbot certonly –webroot -w /var/www/mydomain -d www.mydomain.com </code> === Renew certificate(s) === <code bash> certbot renew </code> === Delete certificate(s) === <code bash> certbot delete –cert-name delete.mydomain.com </code> === Renew certificate(s) using systemd === Check renewal executes without error, <code bash> sudo certbot renew –dry-run </code> == Service unit file == If no error, edit service unit file typically stored in/etc/systemd/system/. Edit/etc/systemd/system/certbot-renewal.service<code ini> [Unit] Description=Certbot Renewal [Service] ExecStart=/usr/bin/certbot renew –post-hook “systemctl restart nginx.service” </code> Which restarts web service after renewing certificate(s). == Timer unit file == Modify/etc/systemd/system/certbot-renewal.timerto adjust timer for certbot renewal. <code ini> [Unit] Description=Timer for Certbot Renewal [Timer] OnBootSec=300 OnUnitActiveSec=2w [Install] WantedBy=multi-user.target </code> The configuration below will activate the service biweekly, and 300 seconds after boot-up. == Using systemctl and journalctl == To start the timer <code bash> sudo systemctl start certbot-renewal.timer </code> To enable the timer to be started on boot-up <code bash> sudo systemctl enable certbot-renewal.timer </code> To show status information for the timer <code bash> systemctl status certbot-renewal.timer </code> To show journal entries for the timer <code bash> journalctl -u certbot-renewal.service </code> —- ==== SSL Configuration on Nginx ==== === Generating Diffie-Hellman Param === <code bash> openssl dhparam -out /..path../dhparma.pem 2048 </code> 4096 bit requires (approximately) 7 times CPU resources than 2048 —- === Standard configuration for enhanced SSL === This configuration is for Nginx Web Server. edit/etc/nginx/sites-available/defaultStandard configuration of Nginx with SSL
    # SSL configuration

     listen 443 ssl default_server;
     listen [::]:443 ssl default_server;
    # default_server should be deleted for multi-casting domains

     ssl_certificate /etc/letsencrypt/live/... (path) .../fullchain.pem;
     ssl_certificate_key /etc/letsencrypt/live/... (path) .../privkey.pem;
     ssl_session_timeout 5m;
     ssl_session_cache shared:SSL:20m;

    # Diffie-Hellman parameter for DHE ciphersuites
     ssl_dhparam /... (path) .../dhparam.pem;

    # Protocols and Ciphers
     ssl_protocols TLSv1.2 TLSv1.1 TLSv1;
     ssl_prefer_server_ciphers on;
    # last two ciphersuites only added because of Android 4.3
     ssl_ciphers 'ECDHE-ECDSA-AES256-GCM-SHA384:ECDHE-RSA-AES256-GCM-SHA384:ECDHE-ECDSA-CHACHA20-POLY1305:ECDHE-RSA-CHACHA20-POLY1305:ECDHE-ECDSA-AES128-GCM-SHA256:ECDHE-RSA-AES128-GCM-SHA256:ECDHE-ECDSA-AES256-SHA384:ECDHE-RSA-AES256-SHA384:ECDHE-ECDSA-AES128-SHA256:ECDHE-RSA-AES128-SHA256:ECDHE-ECDSA-AES256-SHA:ECDHE-RSA-AES256-SHA';

    # Add headers to serve security related headers
     add_header Strict-Transport-Security "max-age=15768000; includeSubDomains; preload;";
     add_header X-Content-Type-Options nosniff;
     add_header X-Frame-Options "SAMEORIGIN";
     add_header X-XSS-Protection "1; mode=block";
     add_header X-Robots-Tag none;
     add_header X-Download-Options noopen;
     add_header X-Permitted-Cross-Domain-Policies none;

    # OCSP Stapling ---
    # fetch OCSP records from URL in ssl_certificate and cache them
     ssl_stapling on;
     ssl_stapling_verify on;

    # verify chain of trust of OCSP response using Root CA and Intermediate certs
     ssl_trusted_certificate /etc/letsencrypt/live/... (path) .../chain.pem;
Nginx live configuration —- ==== Create WebDAV directory on Nginx ====
WebDAV is web protocol based service to open directory and web resources via various ways. To enable WebDAB or Open directory in Nginx. Append the following code insideServer { …}line.Standard configuration of WedDAV directory
  location /webdav {
           alias     /home/user/WebDAV;
           client_body_temp_path /home/user/WebDAV/.temp;

           dav_methods     PUT DELETE MKCOL COPY MOVE;
           dav_ext_methods   PROPFIND OPTIONS;

           create_full_put_path  on;
           dav_access    user:rw group:rw all:r;
           autoindex     on;
           autoindex_format     html;     # OPTION: HTML | XML | JSON
           auth_basic "TITLE FOR YOUR WEBDAV";
           auth_basic_user_file /home/user/WebDAV/.htpasswd;

           #fancyindex on;
           #fancyindex_exact_size off;

         }
Configuration with network allow/deny
  #here you can specify various directories that respond as DAV.
  location /ergo-repo/ {
    root      /var/dav;
    client_body_temp_path /var/dav/temp;
    dav_methods     PUT DELETE MKCOL COPY MOVE;
    dav_ext_methods   PROPFIND OPTIONS;
    create_full_put_path  on;
    dav_access    user:rw group:rw all:rw;
    autoindex     on;
    #below you can specify the access restrictions. In this case, only people on the 141.142 network
    #can write/delete/etc. Everyone else can view.
    limit_except GET PROPFIND OPTIONS{
      allow 141.142.0.0/16;
      deny  all;
    }
    allow all;
  }
  #this is an example of a password restricted repository
  location /password-repo/ {
    root      /var/dav;
    client_body_temp_path /var/dav/temp;
    dav_methods     PUT DELETE MKCOL COPY MOVE;
    dav_ext_methods   PROPFIND OPTIONS;
    create_full_put_path  on;
    dav_access    user:rw group:rw all:rw;
    autoindex     on;
    auth_basic "restricted";
    auth_basic_user_file /etc/nginx/htpasswd;
  }
Fancyindexis an optional part if you have installednginx-extraornginx-full. AfterStretchRapbian upgrade,Fancyindexfeature could not work. <code nginx> fancyindex on; fancyindex_exact_size off; </code> == Authentication for access ==.htpasswdfile is authentication file for user to access correctly. To generate this file, installhtpasswd. <code bash> sudo apt-get install apache2-utils </code> If you don’t have an .htpasswd or create new one, use the-coption to generate the file with the first user. It will prompt you for a password and encrypt it for you. <code bash> htpasswd -c /..path../ .. /../.htpasswd firstuser </code> To add another user for this, <code bash> htpasswd /..path../ .. /../.htpasswd seconduser </code> Delete user. If the username exists in the specified.htpasswdfile, it will be deleted. <code bash> htpasswd -D /..path../ .. /../.htpasswd firstuser </code> Accesshttps://YOUR.DOMAINS.COM/WebDAVin browser and check whether prompt dialogue pops up. —- ==== Backup & archive web resources ==== Usingrsync, backup and archive web resource into another location. <code bash> 30 5 * * 3 /usr/bin/rsync -Aax /var/www/ /.. (backup path..) ../web_backup_`date +”%Y%m%d”`/ </code> Assume web root directory is/var/www/and to create backup folder with date,
Appendcrontabwith root privilege -sudo crontab -e.
30 5 * * 3means run script at 05:30 (AM) every Wednesday (Mon:1… Sun:7or0) —- ==== Change style of web directory for WebDAV ==== Fancyindex modules in Nginx <code bash> sudo apt-get install nginx-extras </code> Addfancyindexdirectives in virtual host configuration files. <code nginx> location / { fancyindex on; fancyindex_exact_size off } </code> Insert following lines to let Fancyindex work in the web directory. <code nginx> fancyindex on; fancyindex_localtime on; fancyindex_exact_size off; # Specify the path to the header.html and foother.html files (server-wise) fancyindex_header “/Nginx-Fancyindex-Theme/header.html”; fancyindex_footer “/Nginx-Fancyindex-Theme/footer.html”; # Ignored files will not show up in the directory listing, but will still be public. fancyindex_ignore “examplefile.html”; # Making sure folder where these files are do not show up in the listing. fancyindex_ignore “Nginx-Fancyindex-Theme”; # Maximum file name length in bytes, change as you like. fancyindex_name_length 255; </code> —- ==== Customized 404 page ==== Adding in/etc/nginx/sites-available/YOUR-WEB-CONFIG<code nginx> error_page 404 /custom_404.html; location = /custom_404.html { root /var/www/html; internal; } </code> For 50x page, <code nginx> error_page 500 502 503 504 /custom_50x.html; location = /custom_50x.html { root /var/www/html; internal; } </code> For test purpose, adding a dummy FastCGI pass with following lines. <code nginx> location /testing { fastcgi_pass unix:/does/not/exist; } </code> —- ==== Unknown directive after upgrading Stretch ==== *dav_ext_methodsdirective failed *fancyindexdirective failed This problem is due to not loading proper module in Nginx configuration.
Edit/etc/nginx/nginx.conf<code nginx> user www-data; worker_processes auto; pid /run/nginx.pid; include /etc/nginx/modules-enabled/*.conf; events { worker_connections 12288; } </code> If this does not work, please check modules are located correctly or not in/etc/nginx/modules-enabled. If not, runsudo apt-get install nginx-extra. —- ==== Setup password authentication in Nginx ==== <code bash> sudo apt-get update sudo apt-get install apache2-utils </code> Generating (creating) password file to enable authentication <code bash> sudo htpasswd -c /etc/nginx/.htpasswd username </code> Appending user in existing password file <code bash> sudo htpasswd /etc/nginx/.htpasswd another_user </code> —- ==== Configure HTTP/2 for Nginx ==== Edit/etc/nginx/sites-available/default<code nginx> listen 443 ssl http2 default_server; listen [::]:443 ssl http2 default_server; </code> Edit/etc/nginx/nginx.confinsert following line after <code nginx> ssl_prefer_server_ciphers on; </code> <code nginx> ssl_ciphers EECDH+CHACHA20:EECDH+AES128:RSA+AES128:EECDH+AES256:RSA+AES256:EECDH+3DES:RSA+3DES:!MD5; </code> HTTTP/2 online test: HTTP2 Pro For more information: How To Set Up Nginx with HTTP/2 Support on Ubuntu 16.04 —- ==== Nginx cache control ==== Theoretical background: Google Web Fundementals Create/web.root/expires.confsite dedicated configuration file. <code nginx> # Expire rules for static content # cache.appcache, your document html and data location ~* \.(?:manifest|appcache|html?|xml|json)$ { expires -1; # access_log logs/static.log; # I don't usually include a static log } # Feed location ~* \.(?:rss|atom)$ { expires 1h; add_header Cache-Control “public”; } # Media: images, icons, video, audio, HTC location ~* \.(?:jpg|jpeg|gif|png|ico|cur|gz|svg|svgz|mp4|ogg|ogv|webm|htc)$ { expires 1M; access_log off; add_header Cache-Control “public”; } # CSS and Javascript location ~* \.(?:css|js)$ { expires 1y; access_log off; add_header Cache-Control “public”; } </code> includeconfinNginx site configuration<code nginx> server { # Note that it's listening on port 9000 listen 9000 default_server; root /web.root/; index index.html index.htm; server_name example.com www.example.com; charset utf-8; include /web.root/basic.conf; location / { try_files $uri $uri/ =404; } } </code> —- ==== Activate gzip module ==== Nginx Manual edit/etc/nginx/nginx.confadd following lines oruncomment out<code nginx> gzip on; gzip_disable “msie6”; # gzip_vary on; # gzip_proxied any; # gzip_comp_level 6; # gzip_buffers 16 8k; # gzip_http_version 1.1; # gzip_types text/plain text/css application/json application/x-javascript text/xml application/xml application/xml+rss text/javascript; </code> Verify working usingcURLwithAccept-Encoding<code bash> curl -H “Accept-Encoding: gzip” -I https://web.url/uri/object.css </code> —- ==== Disable build-in bluetooth ==== Add configuration string inconfig.txt<code bash> echo “dtoverlay=pi3-disable-wifi” | sudo tee -a /boot/config.txt echo “dtoverlay=pi3-disable-bt” | sudo tee -a /boot/config.txt </code> Disable systemd service that initializez Bluetooth Modems connected by UART. <code bash> sudo systemctl disable hciuart </code> —- ==== Solved Problems ==== === symbol lookup error === Problem: Error duringsudo apt updateSymptom <code text> apt-get: symbol lookup error: /usr/lib/arm-linux-gnueabihf/libapt-pkg.so.4.12: undefined symbol: </code> Solution: reinstall package <code bash> # Download the current version of libapt-pkg4.12 wget http://mirrordirector.raspbian.org/raspbian/pool/main/a/apt/libapt-pkg4.12_0.9.7.9+rpi1+deb7u7_armhf.deb # Install it sudo dpkg -i libapt-pkg4.12_0.9.7.9+rpi1+deb7u7_armhf.deb </code> —- ==== Known Problems ==== === upstream timed out(110: Connection timed out) === Problem: Error found in log/var/log/nginx/xxx_error.log, <code logtalk> upstream timed out (110: Connection timed out) while reading response header from upstream </code> Symptom: No symptom while running website. Only found in error log. Solution: Solution #1 —- === Under-voltage detected! (0x00050005) === Problem: Error found in log/var/log/kern.log, <code logtalk> Under-voltage detected! (0x00050005) </code> Symptom: No symptom while running website. Only found in error log. Solution: