This is an old revision of the document!
- Linux
- Windows
- Android
Webius Officium ─ NiMBUS deBlanc
Name: assignment_turned_in NiMBUS deBlanc (official) | create 구운몽 (korean)
Specification
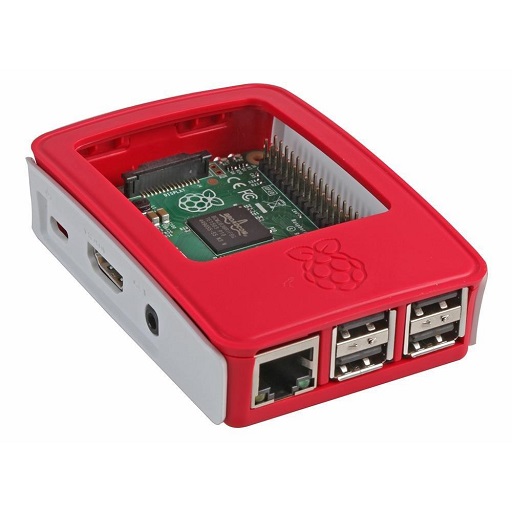
developer_board Model: Raspberry Pi 3 Model B Raspbierry Pi Model B
sd_storage 240G on /var/www & 500G on ~/storage — Storage in details
Live status of storages
Mounted on  Type  Size  Used Avail Use%
~/storage   ext4  458G  130G  305G  30%
/var/www    ext4  220G   18G  191G   9%
network_wifi Wired (eth0), Wireless (wlan0) & Wired (eth1) — Júne's home network
https Web service and web resources including WebDAV
Hosting Services
Júne's PiON Gateway — WebDAV and Documents Archives
Júne's Cloud Platform — Gateway for all cloud services
Júne's Wiki — What I Know Is … Here
Live Nginx Configuration for NiMBUS
+Work logs
Renew SSL certificates(Let's Encrypt) done — Updated on 2019/08/01 18:48configureaccess.log and error.log separately — Updated on 2018/09/20 11:12createserver block for [dav.meson.in] — Updated on 2018/08/14 15:35createserver block for [lib.meson.one] library project — Updated on 2018/04/11 18:22- Activate gzip module in Nginx — Updated on 2018/02/27 06:10
- Configured HTTP/2 for all sites — Updated on 2018/02/15 19:45
- Finished to publish front page of
pi.meson.oneandcloud.meson.in Add USB Wireless (802.11n)and assigned — Updated on 2018/01/31 19:47
+Que to do
- reverse proxy configuration
- rsync with cloud service such as Box or Dropbox
- Check security for WebDAV access and configuration
Enable your Server Blocks
sudo ln -s /etc/nginx/sites-available/example.com /etc/nginx/sites-enabled/
Let's Encrypt
Login with Superuser root and clone required packages. Target directory is /root/letsencrypt. Target directory could be wherever you want, which you should be careful about security and permission. Therefore, /root directory is a recommended whereas.
  sudo su
  git clone https://github.com/letsencrypt/letsencrypt /root/letsencrypt
Go to target directory to run the script
  cd /root/letsencrypt
  ./certbot-auto certonly --webroot --rsa-key-size 4096 -w /var/www/YOUR_ROOT_DIR/ -d YOUR.DOMAIN.COM
YOUR_ROOT_DIR is root directory for the service of YOUR.DOMAIN.COM. –rsa-key-size could be altered with another bit such as 2048 or less but 4096 is better choice for better security.
After reviewing the successful messages, then default location of certificates is /etc/letsencrypt/live/YOUR.DOMAIN.COM/. Usual error has something to do with not loading any pages in http protocol. So you make sure even simple page (landing page) in YOUR_ROOT_DIR properly.
MAKE SURE the renewal of certificates every 90 days
Renew Let's Encrypt certificates
For renewal certificates, run certbot-auto and follow the proceeds.
./certbot-auto --domains YOUR.DOMAIN.COM
Renew all Let's Encrypt certificates
Renew ALL certificates from Let's Encrypt, run
./certbot-auto renew
Delete certificate(s)
Delete certificates from Let's Encrypt, run
./certbot-auto delete
Let's Encrypt via repository
 sudo apt update
 sudo apt install certbot python-certbot-nginx
command is same as certbot-auto by root privilege.
Create certificate(s)
certbot certonly --webroot -w /var/www/mydomain -d www.mydomain.com
Renew certificate(s)
certbot renew
Delete certificate(s)
certbot delete --cert-name delete.mydomain.com
Renew certificate(s) using systemd
Check renewal executes without error,
sudo certbot renew --dry-run
Service unit file
If no error, edit service unit file typically stored in /etc/systemd/system/. Edit /etc/systemd/system/certbot-renewal.service
[Unit]
Description=Certbot Renewal

[Service]
ExecStart=/usr/bin/certbot renew --post-hook "systemctl restart nginx.service"
Which restarts web service after renewing certificate(s).
Timer unit file
Modify /etc/systemd/system/certbot-renewal.timer to adjust timer for certbot renewal.
[Unit]
Description=Timer for Certbot Renewal

[Timer]
OnBootSec=300
OnUnitActiveSec=2w

[Install]
WantedBy=multi-user.target
The configuration below will activate the service biweekly, and 300 seconds after boot-up.
Using systemctl and journalctl
To start the timer
sudo systemctl start certbot-renewal.timer
To enable the timer to be started on boot-up
sudo systemctl enable certbot-renewal.timer
To show status information for the timer
systemctl status certbot-renewal.timer
To show journal entries for the timer
journalctl -u certbot-renewal.service
SSL Configuration on Nginx
Generating Diffie-Hellman Param
openssl dhparam -out /..path../dhparma.pem 2048
4096 bit requires (approximately) 7 times CPU resources than 2048
Standard configuration for enhanced SSL
This configuration is for Nginx Web Server. edit /etc/nginx/sites-available/default
Standard configuration of Nginx with SSL
    # SSL configuration

     listen 443 ssl default_server;
     listen [::]:443 ssl default_server;
    # default_server should be deleted for multi-casting domains

     ssl_certificate /etc/letsencrypt/live/... (path) .../fullchain.pem;
     ssl_certificate_key /etc/letsencrypt/live/... (path) .../privkey.pem;
     ssl_session_timeout 5m;
     ssl_session_cache shared:SSL:20m;

    # Diffie-Hellman parameter for DHE ciphersuites
     ssl_dhparam /... (path) .../dhparam.pem;

    # Protocols and Ciphers
     ssl_protocols TLSv1.2 TLSv1.1 TLSv1;
     ssl_prefer_server_ciphers on;
    # last two ciphersuites only added because of Android 4.3
     ssl_ciphers 'ECDHE-ECDSA-AES256-GCM-SHA384:ECDHE-RSA-AES256-GCM-SHA384:ECDHE-ECDSA-CHACHA20-POLY1305:ECDHE-RSA-CHACHA20-POLY1305:ECDHE-ECDSA-AES128-GCM-SHA256:ECDHE-RSA-AES128-GCM-SHA256:ECDHE-ECDSA-AES256-SHA384:ECDHE-RSA-AES256-SHA384:ECDHE-ECDSA-AES128-SHA256:ECDHE-RSA-AES128-SHA256:ECDHE-ECDSA-AES256-SHA:ECDHE-RSA-AES256-SHA';

    # Add headers to serve security related headers
     add_header Strict-Transport-Security "max-age=15768000; includeSubDomains; preload;";
     add_header X-Content-Type-Options nosniff;
     add_header X-Frame-Options "SAMEORIGIN";
     add_header X-XSS-Protection "1; mode=block";
     add_header X-Robots-Tag none;
     add_header X-Download-Options noopen;
     add_header X-Permitted-Cross-Domain-Policies none;

    # OCSP Stapling ---
    # fetch OCSP records from URL in ssl_certificate and cache them
     ssl_stapling on;
     ssl_stapling_verify on;

    # verify chain of trust of OCSP response using Root CA and Intermediate certs
     ssl_trusted_certificate /etc/letsencrypt/live/... (path) .../chain.pem;
Create WebDAV directory on Nginx
WebDAV is web protocol based service to open directory and web resources via various ways. To enable WebDAB or Open directory in Nginx. Append the following code inside Server { …} line.
Standard configuration of WedDAV directory
  location /webdav {
           alias     /home/user/WebDAV;
           client_body_temp_path /home/user/WebDAV/.temp;

           dav_methods     PUT DELETE MKCOL COPY MOVE;
           dav_ext_methods   PROPFIND OPTIONS;

           create_full_put_path  on;
           dav_access    user:rw group:rw all:r;
           autoindex     on;
           autoindex_format     html;     # OPTION: HTML | XML | JSON
           auth_basic "TITLE FOR YOUR WEBDAV";
           auth_basic_user_file /home/user/WebDAV/.htpasswd;

           #fancyindex on;
           #fancyindex_exact_size off;

         }
Configuration with network allow/deny
  #here you can specify various directories that respond as DAV.
  location /ergo-repo/ {
    root      /var/dav;
    client_body_temp_path /var/dav/temp;
    dav_methods     PUT DELETE MKCOL COPY MOVE;
    dav_ext_methods   PROPFIND OPTIONS;
    create_full_put_path  on;
    dav_access    user:rw group:rw all:rw;
    autoindex     on;
    #below you can specify the access restrictions. In this case, only people on the 141.142 network
    #can write/delete/etc. Everyone else can view.
    limit_except GET PROPFIND OPTIONS{
      allow 141.142.0.0/16;
      deny  all;
    }
    allow all;
  }
  #this is an example of a password restricted repository
  location /password-repo/ {
    root      /var/dav;
    client_body_temp_path /var/dav/temp;
    dav_methods     PUT DELETE MKCOL COPY MOVE;
    dav_ext_methods   PROPFIND OPTIONS;
    create_full_put_path  on;
    dav_access    user:rw group:rw all:rw;
    autoindex     on;
    auth_basic "restricted";
    auth_basic_user_file /etc/nginx/htpasswd;
  }
Fancyindex is an optional part if you have installed nginx-extra or nginx-full.
After Stretch Rapbian upgrade, Fancyindex feature could not work.
   fancyindex on;
   fancyindex_exact_size off;
Authentication for access
.htpasswd file is authentication file for user to access correctly. To generate this file, install htpasswd.
sudo apt-get install apache2-utils
If you don’t have an .htpasswd or create new one, use the -c option to generate the file with the first user. It will prompt you for a password and encrypt it for you.
htpasswd -c /..path../ .. /../.htpasswd firstuser
To add another user for this,
htpasswd /..path../ .. /../.htpasswd seconduser
Delete user. If the username exists in the specified .htpasswd file, it will be deleted.
htpasswd -D /..path../ .. /../.htpasswd firstuser
Access https://YOUR.DOMAINS.COM/WebDAV in browser and check whether prompt dialogue pops up.
Backup & archive web resources
Using rsync, backup and archive web resource into another location.
30 5 * * 3 /usr/bin/rsync -Aax /var/www/ /.. (backup path..) ../web_backup_`date +"%Y%m%d"`/
Assume web root directory is /var/www/ and to create backup folder with date,
Append crontab with root privilege - sudo crontab -e.
30 5 * * 3 means run script at 05:30 (AM) every Wednesday (Mon:1 … Sun:7 or 0)
Change style of web directory for WebDAV
Fancyindex modules in Nginx
sudo apt-get install nginx-extras
Add fancyindex directives in virtual host configuration files.
  location / {
    fancyindex on;
    fancyindex_exact_size off
  }
Insert following lines to let Fancyindex work in the web directory.
   fancyindex on;
   fancyindex_localtime on;
   fancyindex_exact_size off;
  # Specify the path to the header.html and foother.html files (server-wise)
   fancyindex_header "/Nginx-Fancyindex-Theme/header.html";
   fancyindex_footer "/Nginx-Fancyindex-Theme/footer.html";
  # Ignored files will not show up in the directory listing, but will still be public.
   fancyindex_ignore "examplefile.html";
  # Making sure folder where these files are do not show up in the listing.
   fancyindex_ignore "Nginx-Fancyindex-Theme";
  # Maximum file name length in bytes, change as you like.
   fancyindex_name_length 255;
Customized 404 page
Adding in /etc/nginx/sites-available/YOUR-WEB-CONFIG
  error_page 404 /custom_404.html;
        location = /custom_404.html {
                root /var/www/html;
                internal;
        }
For 50x page,
  error_page 500 502 503 504 /custom_50x.html;
        location = /custom_50x.html {
                root /var/www/html;
                internal;
        }
For test purpose, adding a dummy FastCGI pass with following lines.
    location /testing {
                fastcgi_pass unix:/does/not/exist;
        }
Unknown directive after upgrading Stretch
dav_ext_methodsdirective failedfancyindexdirective failed
This problem is due to not loading proper module in Nginx configuration.
Edit /etc/nginx/nginx.conf
    user www-data;
    worker_processes auto;

    pid /run/nginx.pid;

  include /etc/nginx/modules-enabled/*.conf;

    events {
      worker_connections 12288;
    }
If this does not work, please check modules are located correctly or not in /etc/nginx/modules-enabled. If not, run sudo apt-get install nginx-extra.
Setup password authentication in Nginx
sudo apt-get update
sudo apt-get install apache2-utils
Generating (creating) password file to enable authentication
sudo htpasswd -c /etc/nginx/.htpasswd username
Appending user in existing password file
sudo htpasswd /etc/nginx/.htpasswd another_user
Configure HTTP/2 for Nginx
Edit /etc/nginx/sites-available/default
listen 443 ssl http2 default_server;
listen [::]:443 ssl http2 default_server;
Edit /etc/nginx/nginx.conf
insert following line after
ssl_prefer_server_ciphers on;
ssl_ciphers EECDH+CHACHA20:EECDH+AES128:RSA+AES128:EECDH+AES256:RSA+AES256:EECDH+3DES:RSA+3DES:!MD5;
HTTTP/2 online test: HTTP2 Pro
For more information: How To Set Up Nginx with HTTP/2 Support on Ubuntu 16.04
Nginx cache control
Theoretical background: Google Web Fundementals
Create /web.root/expires.conf site dedicated configuration file.
# Expire rules for static content

# cache.appcache, your document html and data
location ~* \.(?:manifest|appcache|html?|xml|json)$ {
  expires -1;
  # access_log logs/static.log; # I don't usually include a static log
}

# Feed
location ~* \.(?:rss|atom)$ {
  expires 1h;
  add_header Cache-Control "public";
}

# Media: images, icons, video, audio, HTC
location ~* \.(?:jpg|jpeg|gif|png|ico|cur|gz|svg|svgz|mp4|ogg|ogv|webm|htc)$ {
  expires 1M;
  access_log off;
  add_header Cache-Control "public";
}

# CSS and Javascript
location ~* \.(?:css|js)$ {
  expires 1y;
  access_log off;
  add_header Cache-Control "public";
}
include conf in Nginx site configuration
server {
    # Note that it's listening on port 9000
    listen 9000 default_server;
    root /web.root/;
    index index.html index.htm;

    server_name example.com www.example.com;

    charset utf-8;
    include /web.root/basic.conf;

    location / {
        try_files $uri $uri/ =404;
    }
}
Activate gzip module
edit /etc/nginx/nginx.conf add following lines or uncomment out
gzip on;
gzip_disable "msie6";

# gzip_vary on;
# gzip_proxied any;
# gzip_comp_level 6;
# gzip_buffers 16 8k;
# gzip_http_version 1.1;
# gzip_types text/plain text/css application/json application/x-javascript text/xml application/xml application/xml+rss text/javascript;
Verify working using cURL with Accept-Encoding
curl -H "Accept-Encoding: gzip" -I https://web.url/uri/object.css
Disable build-in bluetooth
Add configuration string in config.txt
echo "dtoverlay=pi3-disable-wifi" | sudo tee -a /boot/config.txt

echo "dtoverlay=pi3-disable-bt" | sudo tee -a /boot/config.txt
Disable systemd service that initializez Bluetooth Modems connected by UART.
sudo systemctl disable hciuart
Solved Problems
symbol lookup error
Problem: Error during sudo apt update
Symptom
apt-get: symbol lookup error: /usr/lib/arm-linux-gnueabihf/libapt-pkg.so.4.12: undefined symbol:
Solution: reinstall package
# Download the current version of libapt-pkg4.12
wget http://mirrordirector.raspbian.org/raspbian/pool/main/a/apt/libapt-pkg4.12_0.9.7.9+rpi1+deb7u7_armhf.deb

# Install it
sudo dpkg -i libapt-pkg4.12_0.9.7.9+rpi1+deb7u7_armhf.deb
Known Problems
upstream timed out(110: Connection timed out)
Problem: Error found in log /var/log/nginx/xxx_error.log,
upstream timed out (110: Connection timed out) while reading response header from upstream
Symptom: No symptom while running website. Only found in error log.
Solution: Solution #1
Under-voltage detected! (0x00050005)
Problem: Error found in log /var/log/kern.log,
Under-voltage detected! (0x00050005)
Symptom: No symptom while running website. Only found in error log.
Solution: